Gluten‑Free Ice Cream Cake isn’t just a dessert it’s a layered celebration. Whether you’re hosting a summer birthday or simply craving something cold, creamy, and indulgent, this treat delivers on every front. In this guide, I’ll walk you through how to make a stunning gluten‑free ice cream cake from scratch: soft cake layers, luscious ice cream, crunchy textures, and fluffy whipped topping. You’ll also get personal tips, expert baking advice. Let’s bring back the joy without the gluten.
Bringing Back Childhood Joy with a Gluten‑Free Ice Cream cake
How it became a family favorite
Start by putting yourself in the kitchen: remember the thrill of slicing into an ice cream cake as a kid? I felt that same joy when I adapted a gluten‑free version—at first a bit nervous, but then amazed how creamy, festive, and nostalgic it felt. With Gluten‑Free Ice Cream Cake layered with cake, ice cream, and cookie crunch, this dessert still hits all the right notes.
Why gluten‑free doesn’t mean limiting indulgence
Thanks to quality gluten‑free flours and naturally gluten‑free ice creams cake, you can build layers that rival any classic ice cream cake. Many store‑bought ice creams are certified gluten‑free, so starting there already puts you ahead. And with easy swaps like gluten‑free Oreos or cookie mix‑ins, you’re not missing anything just building dessert confidence with Gluten‑Free Ice Cream Cake that tastes joyful and complete.
Step-by-Step Guide to Making a Gluten-Free Ice Cream cake
Creating a Gluten-Free Ice Cream Cake from scratch is easier than you’d think, and the result is a dessert that’s just as show-stopping as anything from a bakery. Follow these six simple steps to build a cake that’s as delicious as it is beautiful.
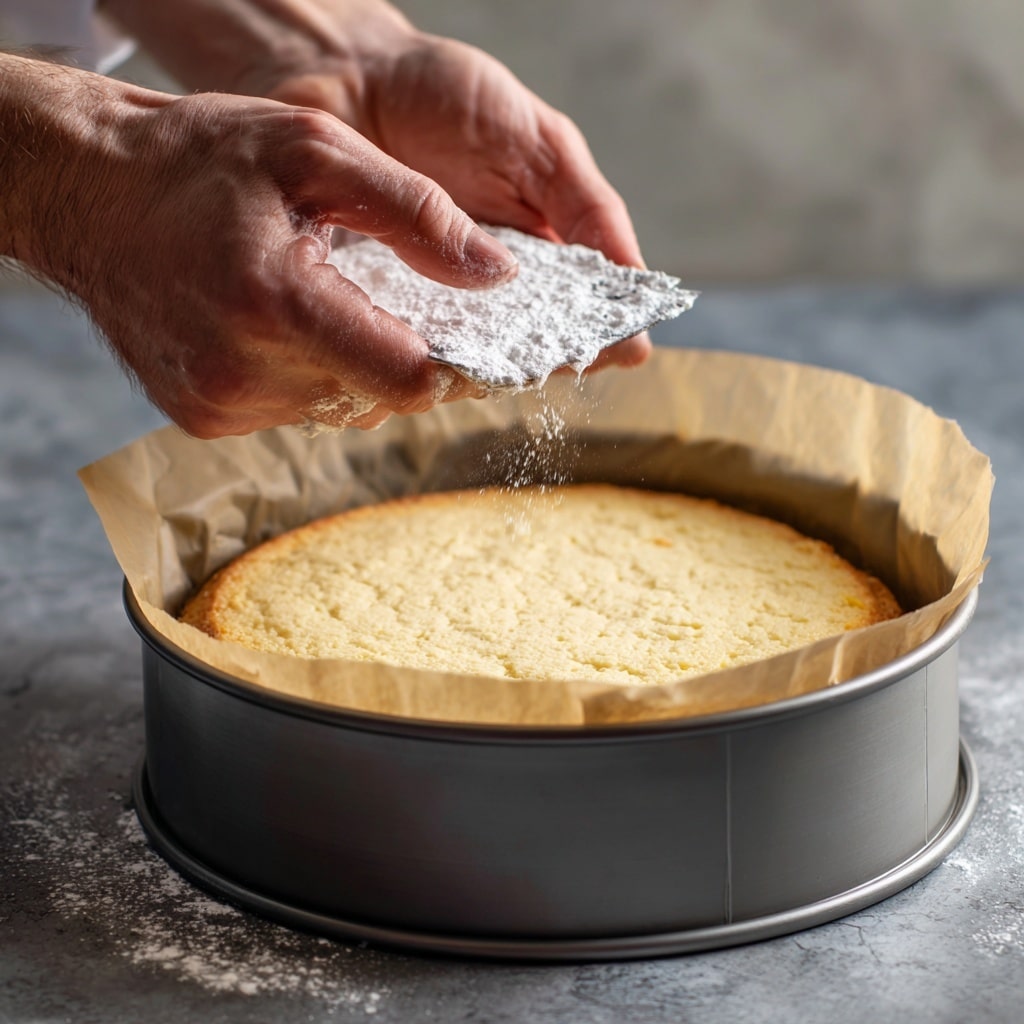
Step 1: Bake your gluten-free cake base
Start with a single 9-inch gluten-free cake layer. You can use a mix or try my gluten-free vanilla sponge. Bake it in a springform pan, cool completely, then freeze the cake layer for at least an hour. This step keeps your base firm and easy to layer.
Step 2: Soften the ice cream
Let 1.5 quarts of gluten-free ice cream sit out for 20–30 minutes. It should be soft enough to spread, not runny. Use a bowl and spatula to stir it into a creamy consistency for even layering.
Step 3: Layer the ice cream
Place the frozen cake in your springform pan. Spread the softened ice cream over the cake evenly, smoothing the top. Press gently to fill gaps and avoid air bubbles.
Gluten-Free Ice Cream Cake
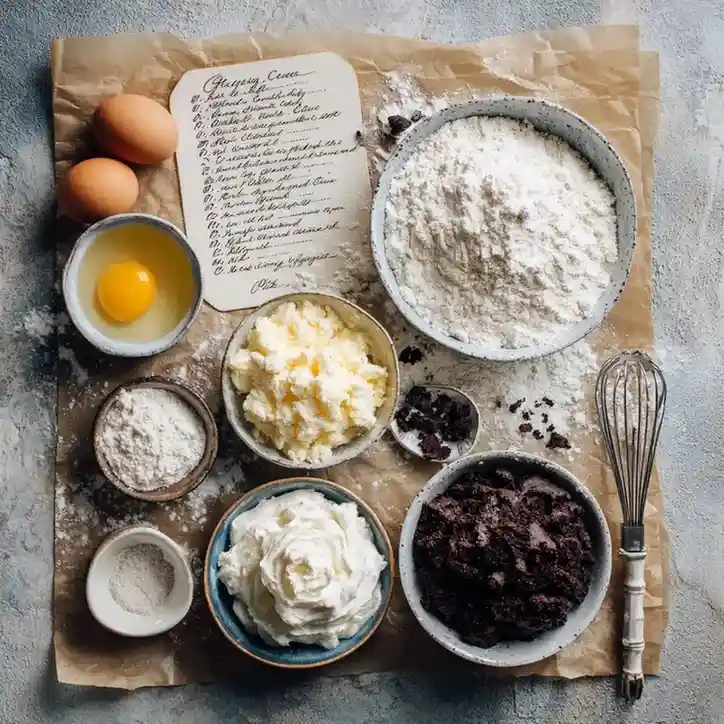
Ingredients
Equipment
Method
- Bake a 9-inch gluten-free cake layer and let it cool completely. Freeze it for at least 1 hour to firm it up.
- Let the ice cream sit at room temperature for 20–30 minutes, then stir to make it smooth and spreadable.
- Place the frozen cake in a springform pan and spread the softened ice cream evenly over the top, pressing gently.

- Sprinkle on crushed cookies and optional fudge or caramel for crunch and flavor.
- Cover and freeze the cake for at least 4 hours or overnight to set.
- Before serving, frost with whipped cream and decorate with sprinkles, berries, or ganache if desired.

Nutrition
Notes
Tried this recipe?
Let us know how it was!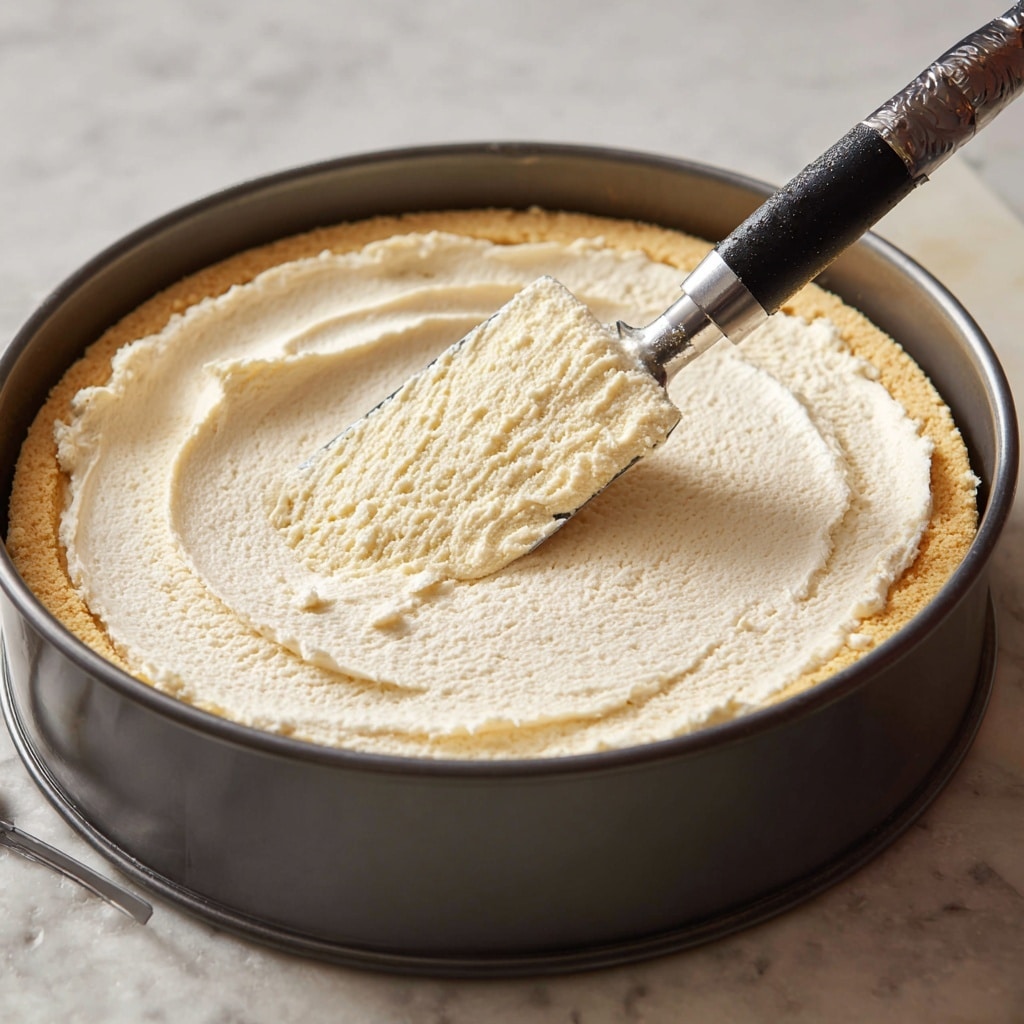
Step 4: Add a crunch or fudge layer
Enhance the middle with crushed gluten-free cookies, caramel bits, or a swirl of fudge. I often use crumbles from my almond cookie recipe to add that nostalgic crunch.
Step 5: Freeze solid
Cover and freeze the cake for 4 hours or overnight. This gives it structure and allows flavors to set.
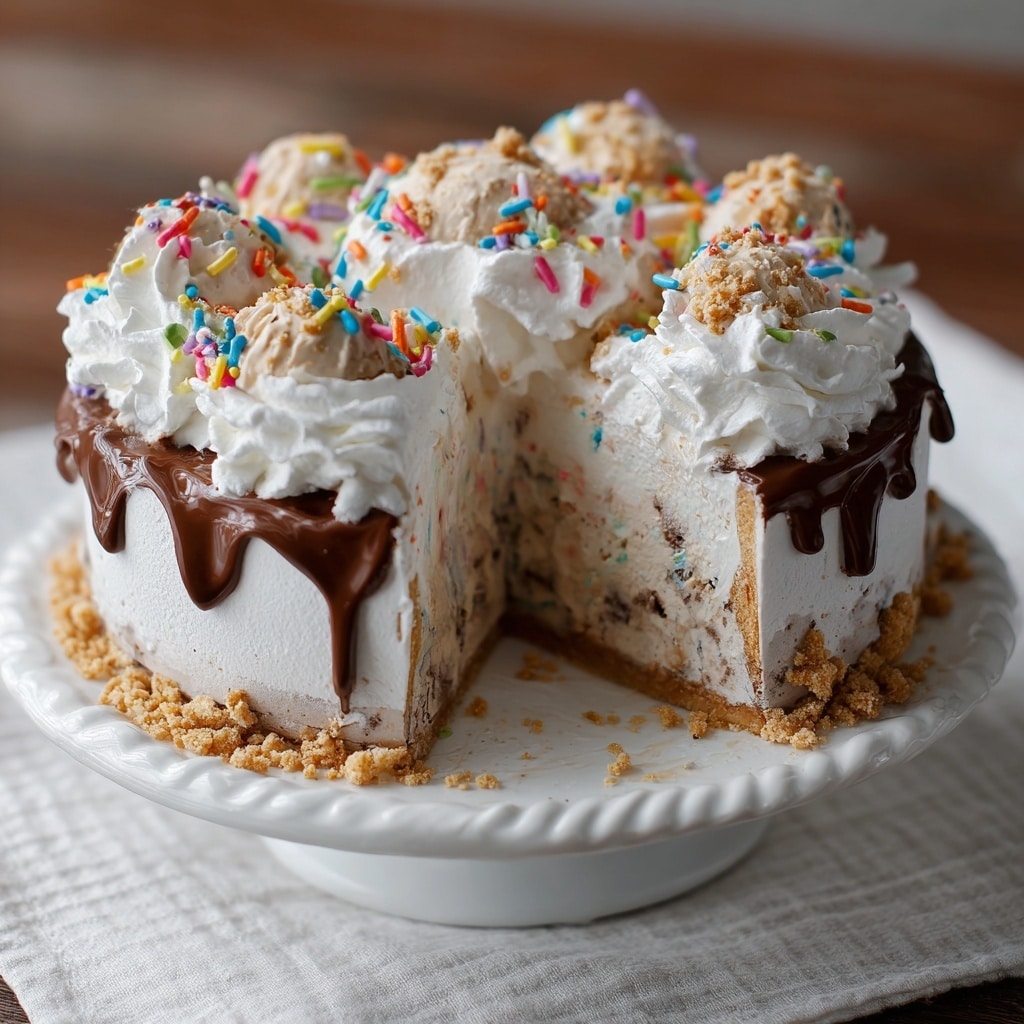
Step 6: Frost and decorate
Before serving, frost with whipped cream or a dairy-free topping. Use a spatula to smooth the sides and top. For extra flair, top with sprinkles, cookie bits, or a drizzle of chocolate.
Decorating and Storing Your Gluten-Free Ice Cream
Once your Gluten-Free Ice Cream Cake is fully frozen, it’s time to make it shine. With the right decorating tips and smart storage, your cake can look just as impressive as anything store-bought while staying fresh and flavorful.
Step 1: Frost with ease
Take your frozen cake out and let it sit for 10 minutes. This softens the edges just enough to allow smooth frosting. Use whipped cream or a dairy-free alternative and spread it evenly with an offset spatula. This step sets the stage for your decoration and gives that clean, professional look.
Step 2: Add visual texture and crunch
Pipe rosettes along the top using a star tip, or simply smooth the whipped topping in soft swirls. For texture, sprinkle on crushed gluten-free cookies or chocolate shavings. they add crunch and contrast beautifully.
Step 3: Personalize for any occasion
Want a birthday look? Add rainbow sprinkles. For a more elegant finish, drizzle a thin stream of chocolate ganache down the sides. Fresh berries or edible flowers also make a beautiful statement.
Step 4: Slice neatly, serve beautifully
Use a long, sharp knife dipped in hot water to slice the cake. Wipe between cuts for clean lines that showcase each layer.
Step 5: Store leftovers the right way
Wrap the entire cake in plastic wrap, then in foil, or place it in an airtight container. It stays fresh in the freezer for up to a week. For easy servings later, slice the cake in advance and freeze each piece individually perfect for spontaneous sweet moments.
Why Homemade Gluten-Free Ice Cream Cake Beats Store-Bought
There’s something deeply satisfying about slicing into a homemade Gluten-Free Ice Cream Cake especially when you know exactly what’s in it. Sure, you can find frozen options in the grocery store, but nothing compares to crafting one yourself. Let’s break down why homemade wins every time.
Control over ingredients and quality
Store-bought cakes often include preservatives, artificial flavors, and gluten-containing additives. When you make your own, you handpick every ingredient—from the base cake to the ice cream and mix-ins. Whether you’re baking for allergies, taste preferences, or just a cleaner label, homemade gives you that power. For instance, my gluten-free flour guide helps you choose blends that deliver reliable results in baking and freezing.
Endless customization options
One of the best parts of making your own ice cream cake? You can mix and match flavors, toppings, and styles. Try layers of chocolate chip and vanilla bean ice cream, or add a raspberry swirl between layers for a fruity twist. Want to go dairy-free too? Use coconut or cashew-based ice cream and a vegan whipped topping.
Perfect for special diets
If you’re gluten-sensitive or celiac, trust is everything. Homemade cakes eliminate the risk of cross-contamination common in restaurant or bakery kitchens. You can ensure your utensils, prep surfaces, and toppings are completely gluten-free, making every bite safe and worry-free.
Better taste and texture
Freshly made cakes and premium ice creams beat frozen supermarket desserts every time. You get that soft bite from the cake, smooth melt from the ice cream, and crunch from add-ins that never get soggy.
Whether you’re serving guests or treating yourself, a homemade Gluten-Free Ice Cream offers unmatched flavor, texture, and peace of mind one sweet slice at a time.
How to Serve Gluten-Free Ice Cream Cake Perfectly
After crafting your Gluten-Free Ice Cream, don’t let serving be an afterthought. The way you slice and present it makes a big impact. Here’s how to make every piece look and taste its best
Step 1: Let it sit before slicing
Remove the cake from the freezer 10–15 minutes before serving. This softens the ice cream just enough to cut cleanly while keeping the structure intact. On warm days, wait until the last moment so the layers stay defined and the texture creamy
Step 2: Use a hot knife for clean slices
Dip a sharp, long-blade knife in hot water, then dry it. Slice through the cake in one smooth motion, then repeat between cuts. This keeps the cake layers sharp and professional just like in my layer cake tips where presentation matters just as much as flavor.
Step 3: Serve with intention
Use chilled dessert plates and add a dollop of whipped cream, a few fresh berries, or a light drizzle of chocolate or caramel. These details enhance both visual appeal and flavor balance.
Step 4: Pair with something light
Offer guests a small glass of almond milk, iced espresso, or a citrus spritzer. These drinks help cut through the richness and complement the dessert’s cool, creamy texture.
Step 5: Add personal flair
Celebrate a birthday? Pop on a candle. Hosting friends? Add edible glitter or themed decorations. These small touches make the moment feel personal and festive.
From freezer to fork, serving your homemade Gluten‑Free Ice Cream cake with care transforms a great dessert into an unforgettable one.
FAQs and Conclusion
FAQs You’re Likely Wondering
Can dairy Queen make gluten-free cakes?
While Dairy Queen offers some gluten-free treats, their signature ice cream cakes typically contain gluten. Always check ingredient lists at your local DQ, and let them know about cross-contamination concerns.
Does gluten-free ice cream exist?
Absolutely. Many major brands (both dairy and dairy-free) label flavors gluten-free. Look for certified or clearly marked ones avoiding mix-ins like cookie dough so your layers stay safe.
Can a gluten-free cake be frozen?
Yes! As we’ve shown, freezing is a key step in building this layered cake. It holds texture and flavor beautifully and stays fresh for up to a week when properly wrapped.
Does Carvel make a gluten-free ice cream cake?
Carvel doesn’t currently offer a fully gluten-free ice cream cake. As with Dairy Queen, there may be safe scooped options, but their traditional cakes use gluten-containing cones and layers. If you want a gluten-friendly version, homemade is the safest, most delicious route.
For more recipes follow me in Facebook
Conclusion
Creating a Gluten‑Free Ice Cream Cake brings together flavor, fun, and nostalgia all without gluten. From baking the sturdy base to layering ice cream, mixing in textures, frosting cleanly, and storing like a pro, you’ve got everything you need for a show-stopping dessert. This cake is more than just a treat it’s a celebration of family traditions and creativity in the kitchen.
If you loved this, be sure to explore my posts on homemade ice cream, cake decorating ideas, and freezer-friendly desserts like my no-churn ice cream guide or party-ready dessert bar tips for more inspiration. Here’s to joyful baking, shared sweetness, and the bridges we build through flavor.