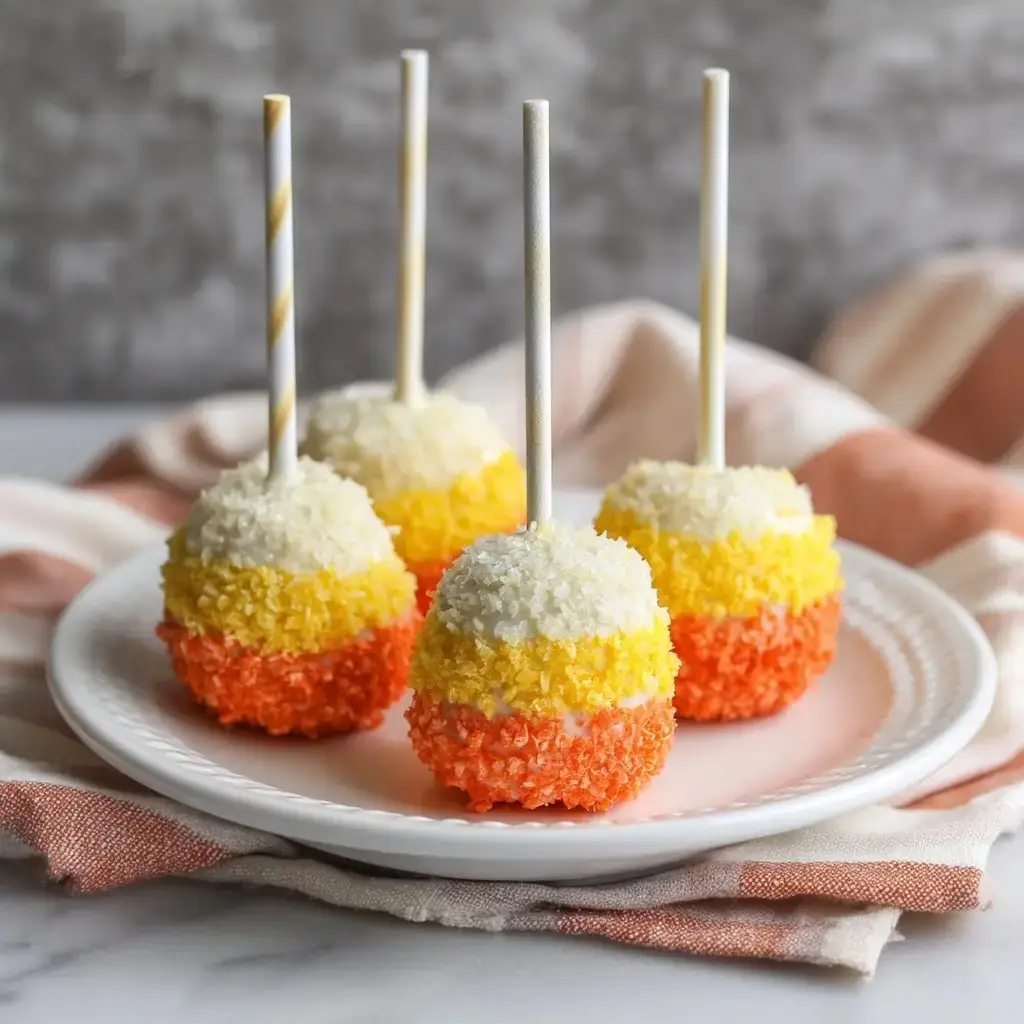
If you love festive desserts that are as fun to make as they are to eat, then Candy Corn Cake Pops are about to become your new favorite fall treat. Inspired by the iconic tri-colored Halloween candy, these bite-sized delights feature moist cake mixed with frosting, dipped in candy melts, and styled to look just like candy corn.
Not only are they adorable, but they’re also the perfect easy dessert recipe for harvest parties, Thanksgiving gatherings, Halloween dessert tables, and even fall birthday celebrations. Let’s dive into everything you need to know to create these show-stopping candy corn desserts.
For mor recipes cake follow me in Facebook
Why Candy Corn Cake Pops Are the Ultimate Fall Dessert
Candy corn is one of the most nostalgic symbols of autumn. Transforming that sweet inspiration into a cake pop means you’re combining the best of both worlds portable, fun desserts and seasonal charm.
Here’s why Candy Corn Cake Pops deserve a spot on your fall dessert menu:
- Festive & Playful: The orange, yellow, and white design instantly brings fall vibes.
- Kid-Friendly: Perfect for classroom treats, party favors, or Thanksgiving cake ideas.
- Easy Desserts: No fancy decorating skills needed just dip, swirl, and decorate.
- Customizable: Use chocolate cake, vanilla cake, or even pumpkin spice cake for variety.
If you’re brainstorming fall cake ideas that are simple yet eye-catching, these pops are a must-try.
Essential Ingredients
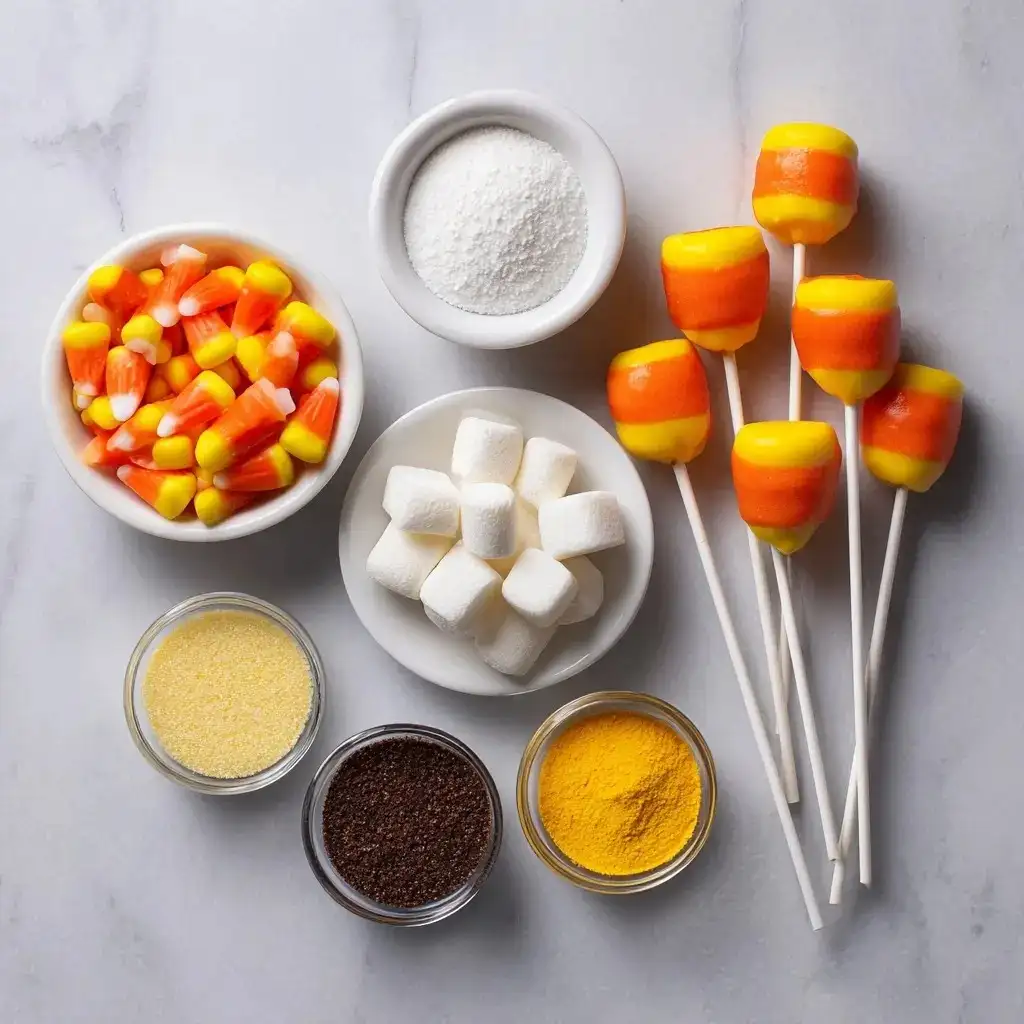
Making cake pops requires just a few basics, plus colorful candy melts for that signature look.
For the Cake Pops:
- 1 baked cake (flavor of choice: vanilla, chocolate, or pumpkin spice)
- ½ cup frosting (buttercream or cream cheese works best)
For the Coating:
- Yellow candy melts
- Orange candy melts
- White candy melts
- Vegetable shortening or coconut oil (for thinning if needed)
For Decorating:
- Candy corn candies
- Sprinkles in fall colors
- Lollipop sticks or cake pop sticks
Step-by-Step Guide to Making Candy Corn Cake Pops
Candy Corn Cake Pops
Ingredients
Equipment
Method
- Bake your cake flavor of choice and let it cool completely before proceeding.
- Break the cooled cake into fine crumbs using your hands or a food processor.
- Mix cake crumbs with frosting a spoonful at a time until the mixture holds together when rolled.
- Roll the mixture into 1-inch balls and place on a parchment-lined tray. Chill for 30 minutes or freeze for 15 minutes.
- Dip the tip of each stick into melted white candy melts and insert into each cake ball.
- Dip the bottom third of the cake pop into yellow candy melts. Let it set before continuing.
- Dip the middle section into orange candy melts. Allow it to set fully.
- Dip the top into white candy melts to complete the candy corn look.
- Decorate with candy corn, sprinkles, or drizzle with chocolate if desired.
Nutrition
Notes
Tried this recipe?
Let us know how it was!1. Bake & Cool the Cake
Prepare your chosen cake flavor (vanilla, chocolate, or pumpkin spice). Allow it to cool completely before moving on to the next step.
2. Crumble the Cake
Break the cake into fine crumbs using your hands or a food processor.
3. Mix with Frosting
Add frosting a spoonful at a time until the mixture is moist enough to hold together when rolled into a ball.
4. Shape the Cake Pops
Roll into small balls (about 1 inch in diameter) and place them on a parchment-lined tray. Chill in the fridge for at least 30 minutes or freeze for 15 minutes.
5. Insert the Sticks
Dip the tip of each stick into melted white candy melts before inserting it into a cake ball. This helps secure the stick.
6. Dip & Decorate
- First, dip the bottom third into yellow melts and let it set.
- Next, dip the middle section into orange melts.
- Finally, dip the top into white melts to complete the candy corn look.
7. Add Final Touches
Decorate with sprinkles, drizzle with chocolate, or place a real candy corn on top for extra flair.
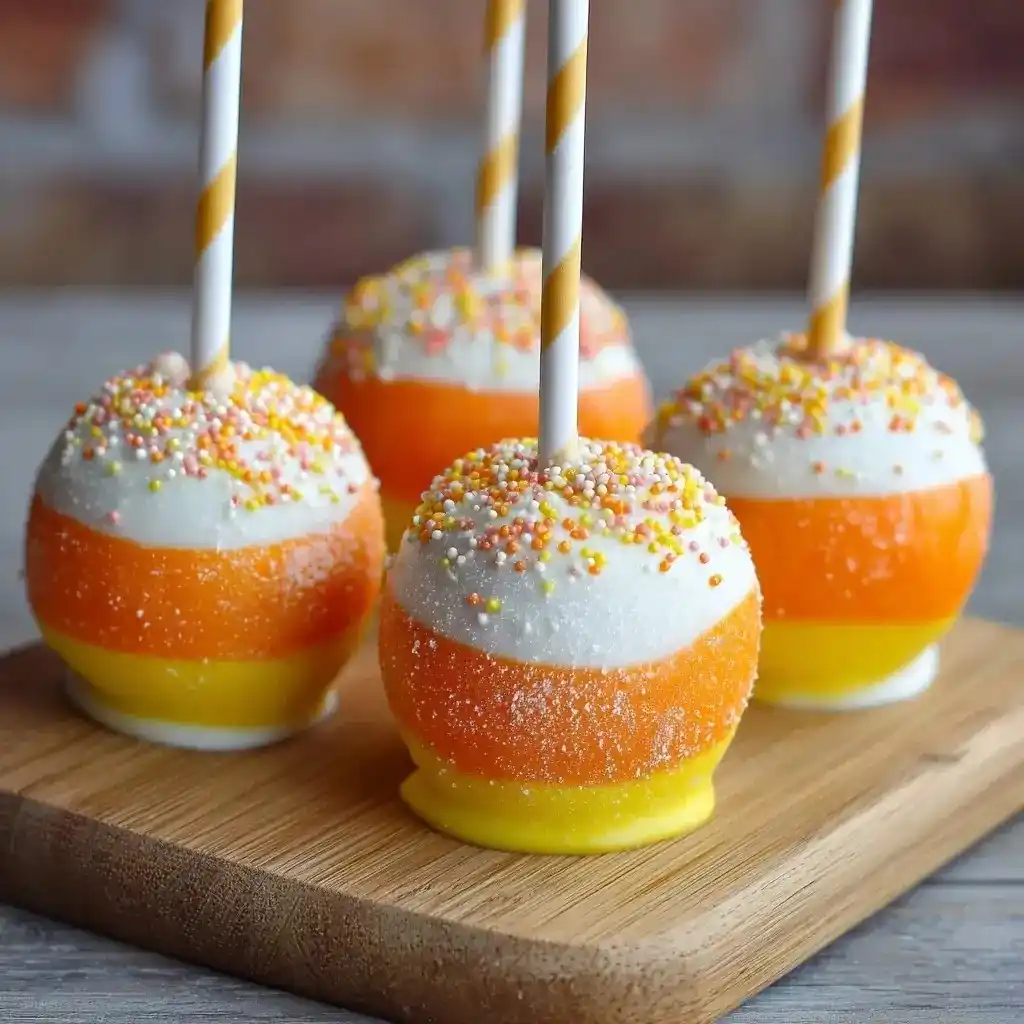
Decorating Ideas for Candy Corn Cake Pops
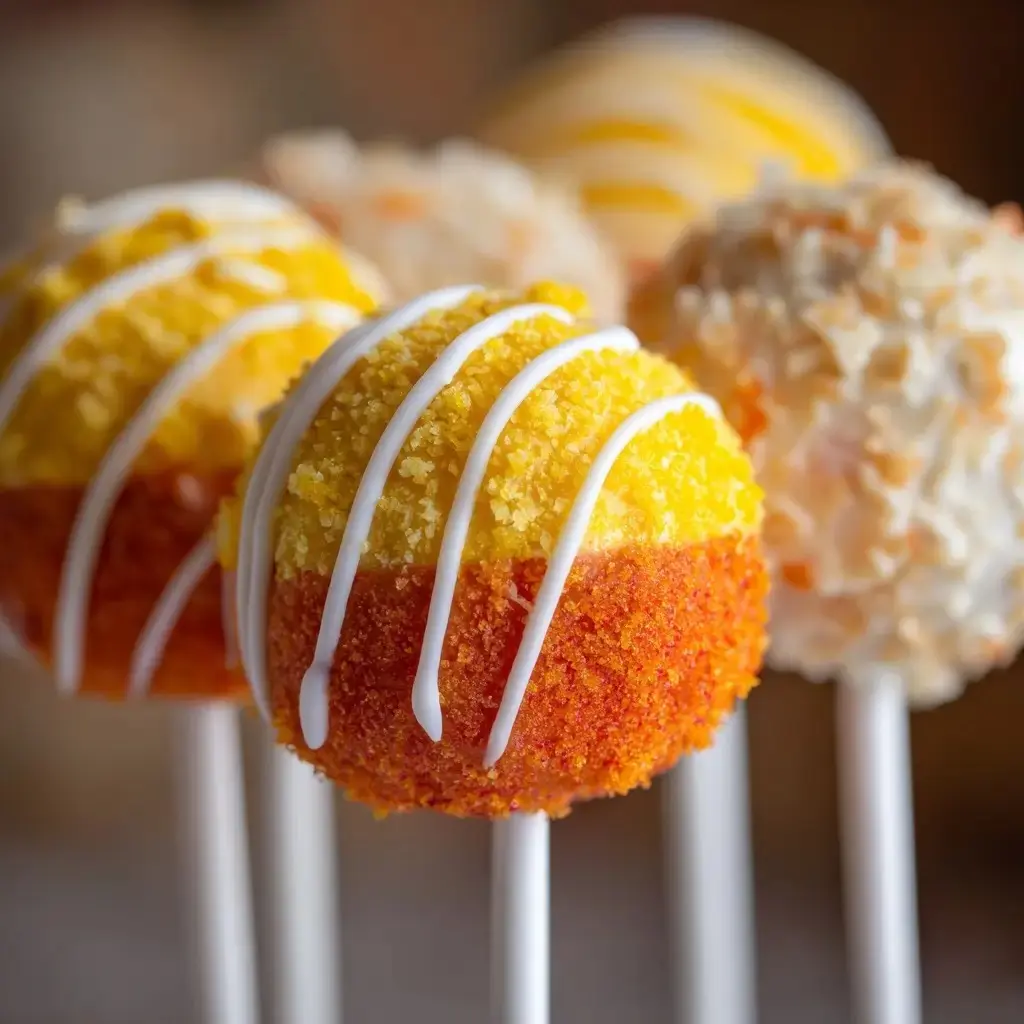
The beauty of cake pops is how customizable they are. Here are some creative ways to style them:
- Classic Candy Corn: Stick to the three-color dip for the authentic look.
- Harvest Cake Pops: Add gold sprinkles, edible glitter, or leaf-shaped decorations.
- Thanksgiving Dessert Ideas: Arrange cake pops in a pumpkin-shaped display as a fun centerpiece.
- Birthday Twist: Personalize with colorful ribbons tied around each stick.
Serving & Pairing Ideas
Candy Corn Cake Pops are versatile and can be served in many ways:
- Bundle them in cellophane bags as party favors.
- Display them in a mason jar or pumpkin vase for harvest tables.
- Pair with hot chocolate, apple cider, or a pumpkin spice latte for the ultimate fall treat.
- Mix them into a dessert buffet alongside pies, cookies, and cakes for variety.
Storage Tips
To keep your Candy Corn Cake Pops fresh and delicious:
- Room Temperature: Store decorated cake pops in an airtight container for up to 3 days.
- Refrigerator: Keep them chilled for up to 1 week.
- Freezer: Undipped cake balls can be frozen for up to 2 months. Thaw before dipping.
Pro Tip: If gifting, package each cake pop individually in a wrapper or bag to keep them neat and protected.
FAQ: Candy Corn Cake Pops
1. Can I make Candy Corn Cake Pops ahead of time?
Yes! Prep the cake balls up to 2 days before dipping, or freeze them for longer storage.
2. Do I need special equipment for cake pops?
Just lollipop sticks and candy melts no fancy gear required. A Styrofoam block helps hold them upright while they dry.
3. Can I use leftover cake for this recipe?
Absolutely! Leftover cake works perfectly when crumbled and mixed with frosting.
4. How do I keep the coating smooth?
If candy melts are too thick, add a teaspoon of vegetable shortening or coconut oil to thin them out.
5. Can I turn these into no-bake pops?
Yes use crushed cookies instead of cake for a quick alternative.
Conclusion
If you’re looking for a festive fall dessert recipe that’s easy, fun, and guaranteed to wow your guests, Candy Corn Cake Pops are the answer. With their playful colors and sweet flavor, they’re perfect for Halloween parties, Thanksgiving dessert tables, or as a unique birthday treat.