There’s something magical about brownies rich, fudgy, and endlessly customizable. But when spooky season rolls around, those same chocolatey squares can transform into a showstopping dessert: Halloween Brownies. With just a few festive toppings, you can turn a simple brownie into a monster, mummy, or graveyard-worthy treat that steals the spotlight at every fall party.
Whether you’re planning a Halloween bash, a classroom treat table, or just a cozy fall baking day, these brownies are easy to make, fun to decorate, and guaranteed to vanish faster than a ghost at midnight.
- For mor recipes cake follow me in Facebook
- For mor cake click here
Why Halloween Brownies Are the Ultimate Fall Dessert
Fall desserts are all about comfort meets creativity, and Halloween Brownies hit both notes perfectly. The deep cocoa flavor pairs beautifully with warm spices, sweet candy toppings, and those classic fall colors orange, black, and purple.
Brownies also have a huge advantage over cakes and cookies: they’re easy. You can whip up a batch in under an hour, decorate them however you like, and make them as spooky or as cute as you want.
Here’s why these brownies are a must-bake this Halloween:
- Customizable for any age: Go creepy with candy eyes and webs, or keep it cute with sprinkles and pumpkin candies.
- Perfect texture: Rich and fudgy in the center, with a slightly crisp top.
- Easy ingredients: Start from scratch or use a boxed mix both versions are delicious.
- Great for parties: Bake, slice, and serve! No need for plates or forks.
Pair these with your favorite fall drink a Pumpkin Spice Latte, apple cider, or even a Pumpkin Spice Coffee Cake slice and you’ve got the ultimate cozy dessert spread.
Essential Ingredients
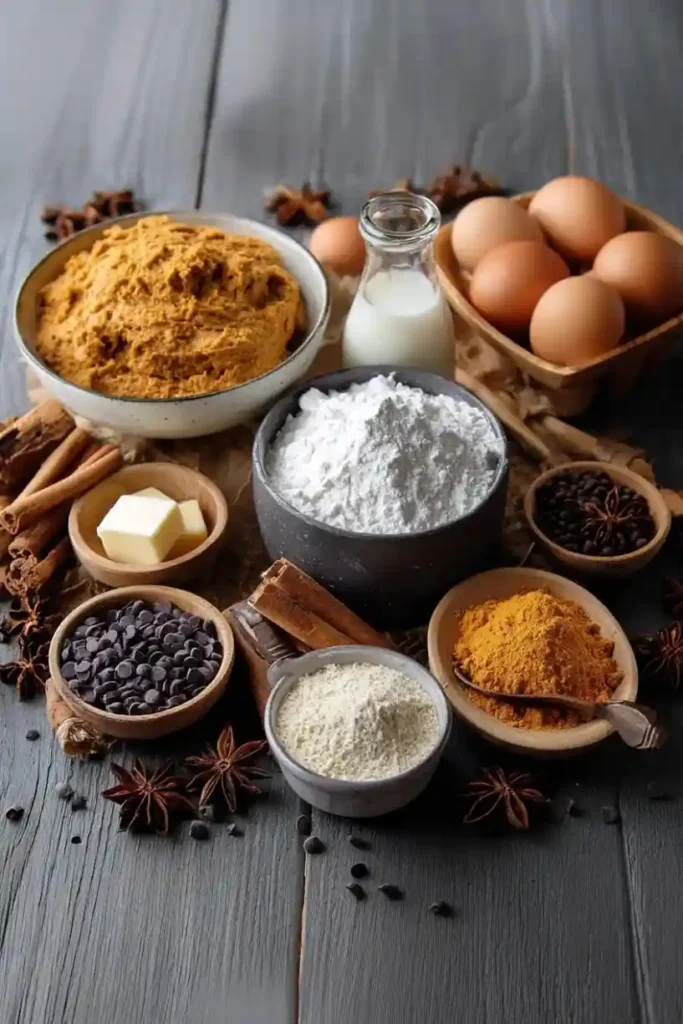
You can use your favorite brownie mix for a quick bake, or make them from scratch. Here’s what you’ll need:
For the Brownies:
- 1 cup unsalted butter, melted
- 2 cups granulated sugar
- 4 large eggs
- 1 teaspoon vanilla extract
- 1 cup all-purpose flour
- 1 cup unsweetened cocoa powder
- ½ teaspoon salt
- ½ teaspoon baking powder
Optional Add-Ins:
- ½ cup mini chocolate chips (for extra fudginess)
- ¼ teaspoon pumpkin pie spice (for a fall flavor twist)
For Decorating:
Get creative! Here are some ideas for turning plain brownies into Halloween masterpieces:
- Candy eyeballs
- Orange, black, or purple icing
- Mini marshmallows (for ghost faces or mummies)
- Crushed Oreos (for “graveyard dirt”)
- Gummy worms
- Candy corn
- Halloween sprinkles
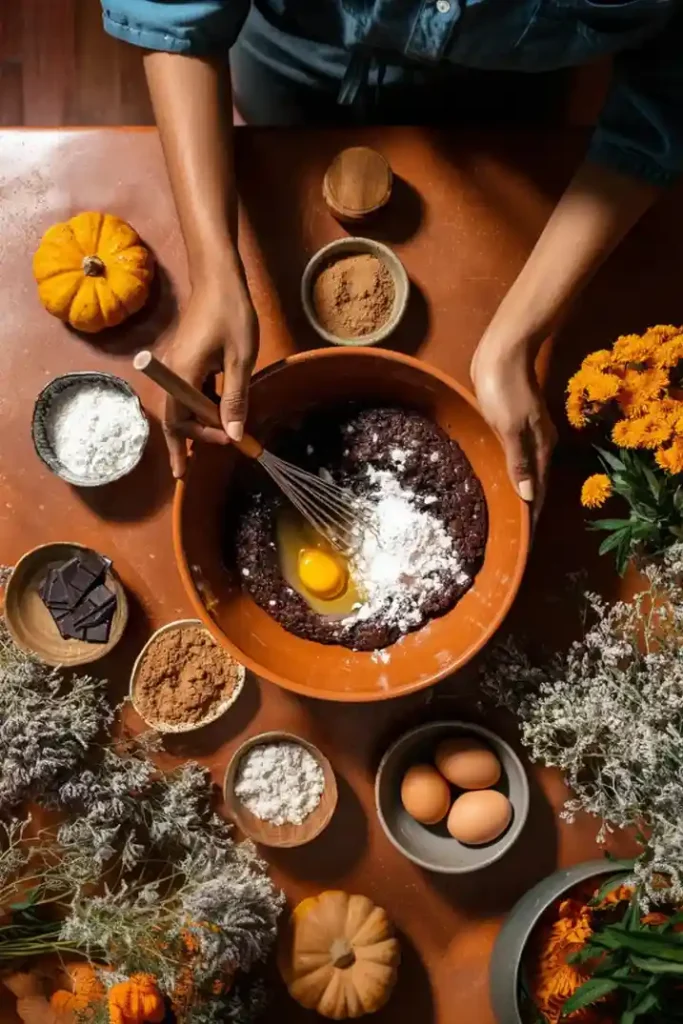
Step-by-Step Baking Guide
Follow these simple steps for the perfect batch of Halloween Brownies every time.
1. Preheat & Prep
Preheat your oven to 350°F (175°C). Line a 9×13-inch baking pan with parchment paper, leaving a bit of overhang on the sides for easy lifting later.
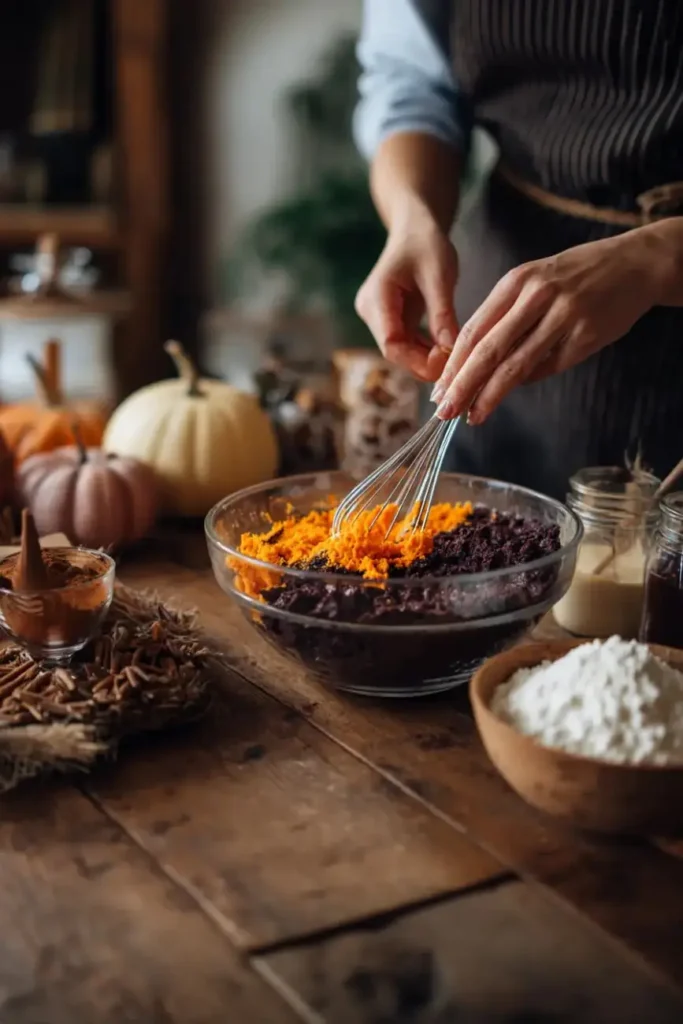
2. Mix the Batter
In a large mixing bowl, whisk together melted butter and sugar until smooth. Add eggs and vanilla extract, mixing well.
In a separate bowl, whisk together flour, cocoa powder, salt, and baking powder. Gradually add dry ingredients to the wet mixture until just combined. Don’t overmix — a few streaks of flour are fine.
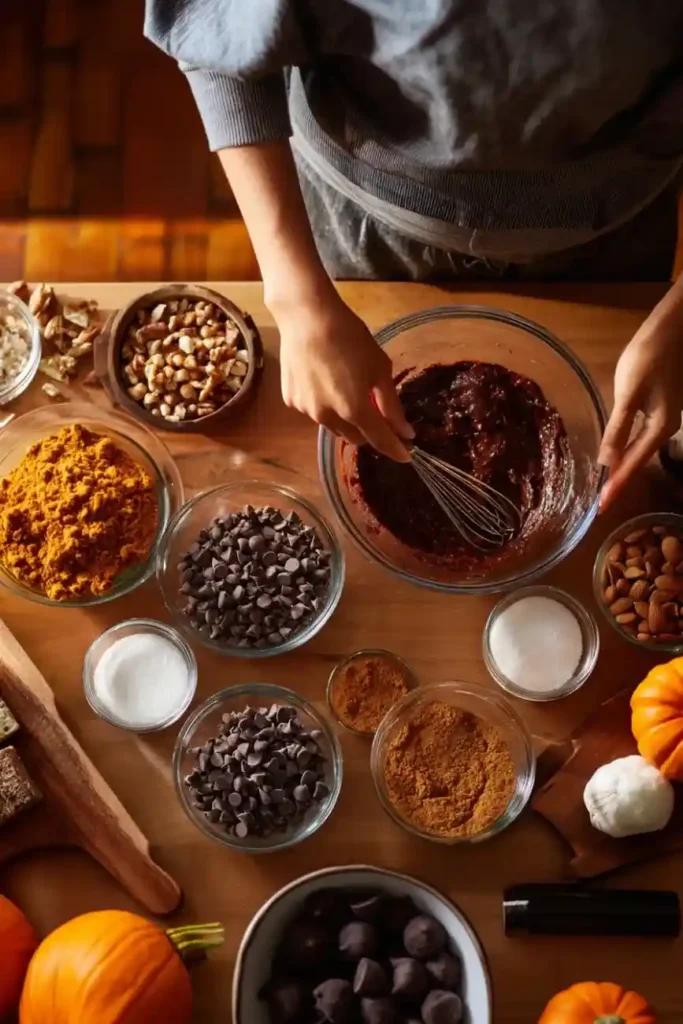
3. Add a Fall Twist
Stir in chocolate chips or a pinch of pumpkin pie spice if you want an extra cozy touch.
4. Bake

Spread the batter evenly in the prepared pan and bake for 28–32 minutes, or until a toothpick inserted in the center comes out with a few moist crumbs.
5. Cool Completely
Let the brownies cool completely in the pan before cutting or decorating. This step ensures clean cuts and keeps the toppings from melting.
Halloween Brownies
Ingredients
Equipment
Method
- Preheat your oven to 350°F (175°C). Line a 9×13-inch baking pan with parchment paper, leaving some overhang on the sides for easy removal.
- In a large bowl, whisk together melted butter and sugar until smooth. Add eggs and vanilla and mix until well combined.
- In another bowl, whisk together flour, cocoa powder, salt, and baking powder. Gradually add to the wet mixture until just combined.
- Stir in optional chocolate chips or pumpkin spice for a fall twist.
- Spread batter evenly into the prepared pan. Bake for 28–32 minutes, until a toothpick comes out with a few moist crumbs.
- Let brownies cool completely in the pan before cutting or decorating.
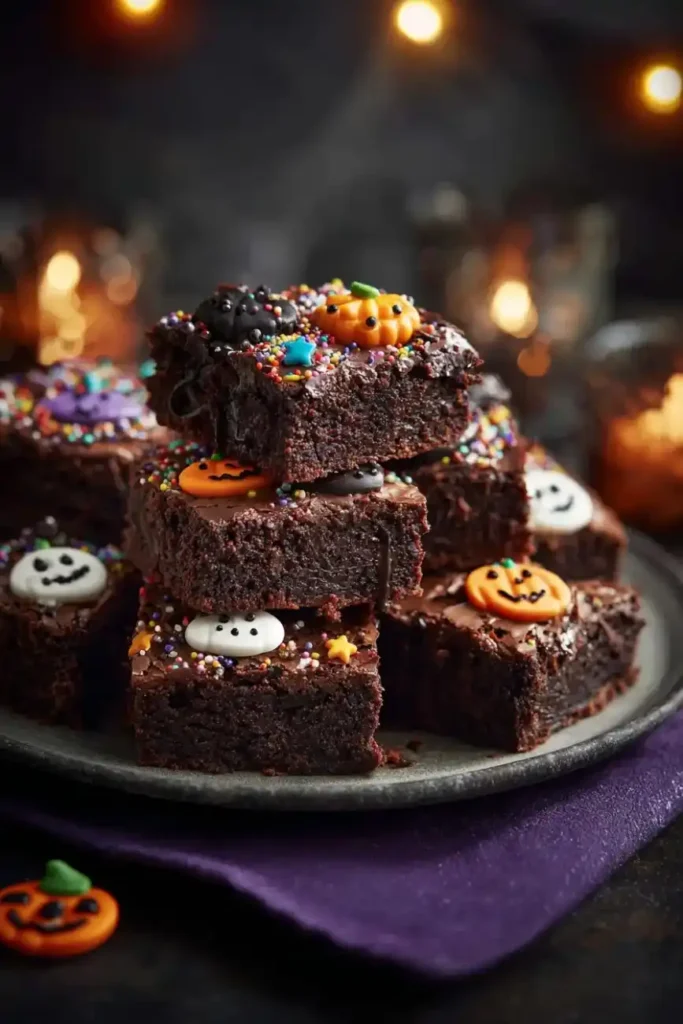
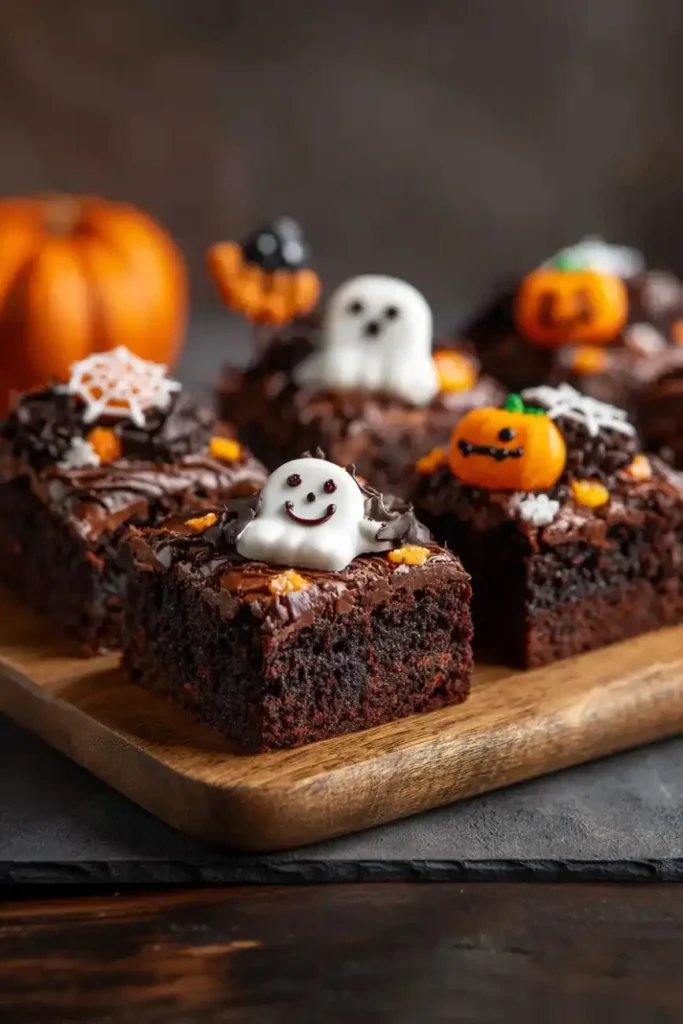
- Decorate brownies as desired: mummy stripes, spiderwebs, graveyard dirt, monster faces, or pumpkin patches. Use icing, crushed cookies, and candies to get creative.
Nutrition
Notes
Tried this recipe?
Let us know how it was!Decorating Your Halloween Brownies
Now for the fun part transforming your brownies into spooky, sweet creations!
1. Mummy Brownies
Cut brownies into rectangles. Drizzle white chocolate or icing in a zig-zag pattern to create “bandages.” Add two candy eyes before the drizzle sets.
2. Graveyard Brownies
Spread a layer of chocolate frosting on top, sprinkle crushed Oreos for “dirt,” and stick in half of a Milano cookie as a tombstone. Use black icing to write “RIP.”
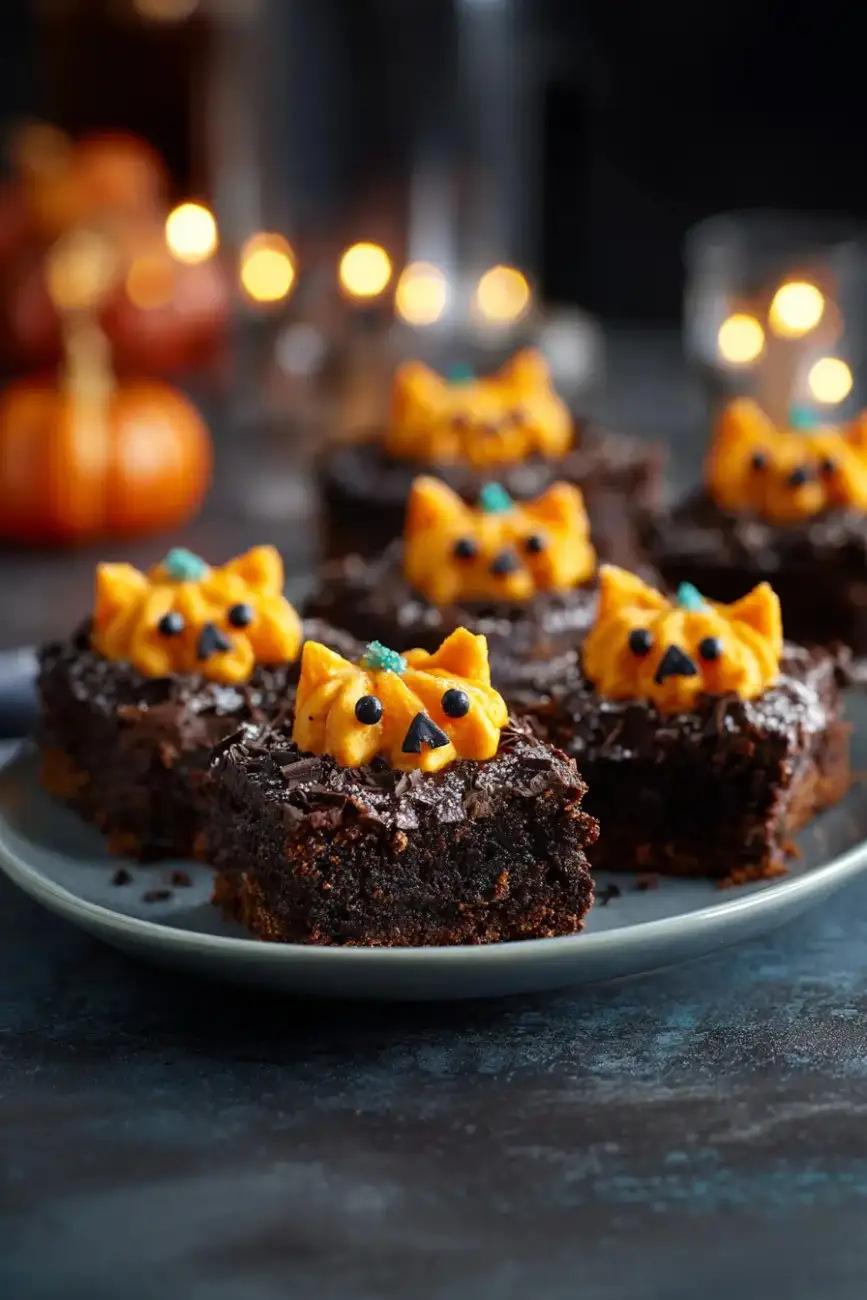
3. Monster Brownies
Add colorful icing swirls, candy eyes, and sprinkles to create silly monster faces. Kids love these!
4. Spiderweb Brownies
Spread melted white chocolate in a spiral pattern on top of each brownie, then use a toothpick to drag lines outward from the center for a web effect.
5. Pumpkin Patch Brownies
Frost the top with orange icing and place a pumpkin candy or candy corn on each square.
Serving & Pairing Ideas
Halloween Brownies are the perfect treat for parties, bake sales, or a cozy fall movie night. Serve them on a spooky platter or a rustic wooden board with festive props like fake spiders, candy corn, and mini pumpkins.
Here are some fun pairing ideas:
- Pumpkin Spice Latte: For that classic coffeehouse fall flavor.
- Hot Apple Cider: Adds a crisp, sweet contrast to the rich chocolate.
- Vanilla Ice Cream: Top warm brownies with a scoop for a decadent dessert.
- Pumpkin Spice Crumb Cake: Pair for a full fall dessert table ([Check out our Pumpkin Spice Crumb Cake Recipe]).
Storage Tips
To keep your Halloween Brownies moist and fresh:
- Room Temperature: Store in an airtight container for up to 3 days.
- Refrigerator: Store up to 5 days if decorated with frosting or candy.
- Freezer: Freeze undecorated brownies (wrapped tightly) for up to 2 months. Defrost at room temperature before decorating or serving.
Pro tip: If you’re making them ahead for a party, bake and freeze the brownies plain. Decorate them the day of your event so colors and candies stay vibrant.
FAQ Halloween Brownies
Q1: Can I use a boxed brownie mix?
Absolutely! Start with your favorite mix and add extra chocolate chips or a pinch of cinnamon for a richer, homemade taste.
Q2: How can I make gluten-free Halloween brownies?
Use a gluten-free flour blend or a gluten-free brownie mix. All your spooky decorations will work the same way!
Q3: How do I make my brownies fudgy, not cakey?
Use melted butter instead of oil, don’t overbake, and avoid overmixing the batter. Fudgy brownies should have a soft, gooey center.
Q4: What’s the best frosting for Halloween brownies?
Chocolate ganache, cream cheese frosting, or white icing work beautifully. You can tint them with gel food coloring for that Halloween pop.
Q5: Can kids help with these?
Yes! Let them drizzle the icing, place candy eyes, or make monster faces. It’s a great family baking activity.
Q6: Can I make themed versions for other holidays?
Of course swap orange and black sprinkles for red and green at Christmas, or pink and purple for Valentine’s Day.
Conclusion
Halloween Brownies are everything you want in a fall dessert quick, rich, chocolatey, and endlessly creative. Whether you make mummy brownies for a classroom treat, Oreo brownies for a Halloween movie night, or spiderweb brownies for a spooky party, they’re sure to impress every ghoul and goblin.
So grab your mixing bowl, fire up the oven, and get your candy decorations ready. With these Halloween Brownies, you’ll have a frightfully fun dessert that’s wickedly easy to make and even easier to eat!